Nacos核心指南:服务发现的安装、配置与实战
Nacos核心指南:服务发现的安装、配置与实战
既然有了 Eureka,为什么还要用 Nacos?
Nacos 作为微服务核心的服务注册与发现中心,在 Eureka 和 Consul 之外提供了新的选择。它开箱即用,上手简洁。
1.1. 与 Eureka 对比
- Eureka 2.0 已经闭源。
- 从官方数据来看,Nacos 支持的注册实例数远大于 Eureka。
- Nacos 使用 Raft 协议,其集群的数据一致性要远强于 Eureka。
分布式一致性协议 Raft,自 2013 年论文发表后备受技术领域热捧。与其他分布式一致性算法相比,Raft 相对简单且易于实现,这也是它能异军突起的主要原因。
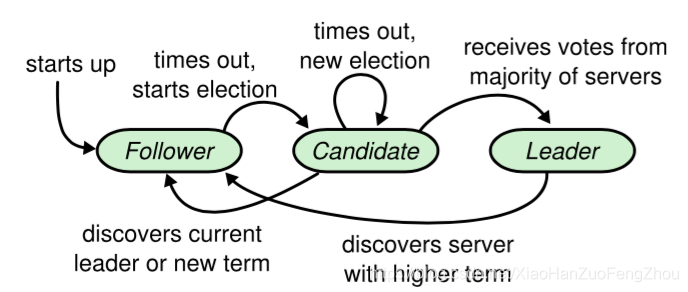
Raft 的数据一致性策略
Raft 协议强依赖 Leader 节点来确保集群数据一致性。
客户端发送的数据均先到达 Leader 节点。Leader 接收到数据后,先将数据标记为 uncommitted 状态,随后 Leader 开始向所有 Follower 复制数据并等待响应。在获得集群中大于 N/2 个 Follower 的成功接收响应后,Leader 将数据状态标记为 committed,然后向客户端发送确认。最后,再向所有 Follower 节点发送通知,表明该数据状态为 committed。
1.2. 与 Spring Cloud Config 对比
Nacos Config 相比 Spring Cloud Config 有三大优势:
- 动态变更更高效:Spring Cloud Config 大部分场景结合 Git 使用,动态变更需要依赖 Spring Cloud Bus 消息总线通知所有客户端;而 Nacos Config 使用长连接更新配置,一旦配置变动,通知过程非常迅速。
- 提供可视化界面:Spring Cloud Config 不提供可视化界面,而 Nacos 提供了美观易用的控制台。
- 性能优势:Nacos Config 的实时通知机制在速度上远超 Spring Cloud Config。
2. Nacos 的架构和安装
2.1. Nacos 架构
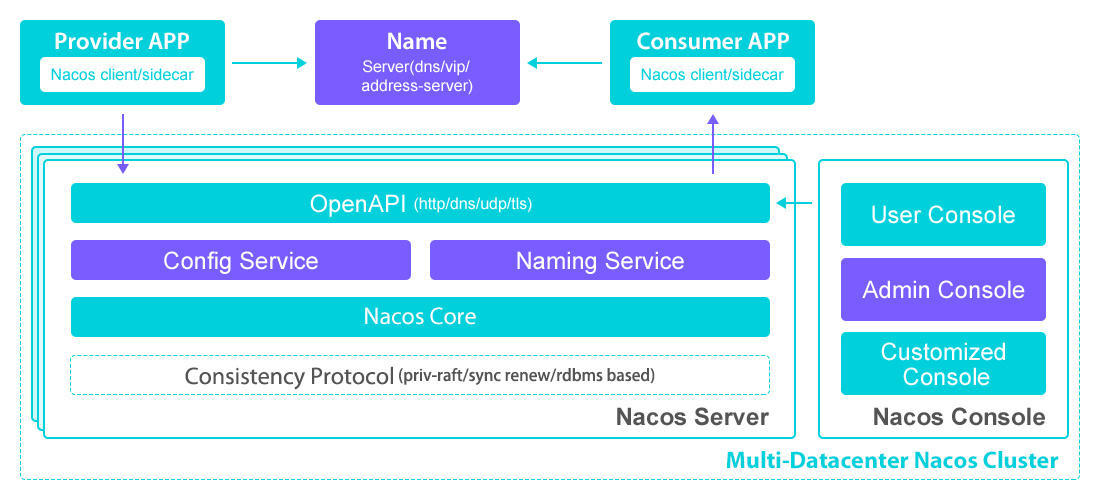
Nacos 融合了服务注册发现中心、配置中心、服务管理等功能,类似于 Eureka/Consul + Config + Admin 的组合体。它不仅可以和 Spring Cloud 集成,还可以和 Spring、SpringBoot 进行集成。
2.2. Nacos Server 下载和安装
在使用 Nacos 之前,需要先下载 Nacos 并启动 Nacos Server。 安装参考教程:https://www.cnblogs.com/crazymakercircle/p/11992539.html
3. Nacos Server 的运行
Nacos Server 有两种运行模式:standalone(单机模式)和 cluster(集群模式)。
3.1. Standalone 模式
此模式一般用于开发和测试,无需修改任何配置。
Linux/macOS:
1
sh bin/startup.sh -m standalone
Windows:
1
cmd bin/startup.cmd -m standalone
启动后,访问 http://<your-ip>:8848/nacos/ 进入控制台。 
默认账号和密码为:nacos / nacos。
3.2. Cluster 模式
生产环境建议使用 Cluster 模式以保证高可用。集群模式需要依赖 MySQL 数据库。
需要修改两个配置文件:
conf/cluster.confconf/application.properties
步骤如下:
- 配置
cluster.conf填入要运行 Nacos Server 机器的 IP 地址,每行一个。1 2
192.168.100.155 192.168.100.156
- 配置
application.properties添加 MySQL 数据源配置。1 2 3 4
db.num=1 db.url.0=jdbc:mysql://localhost:3306/nacos_config?characterEncoding=utf8&connectTimeout=1000&socketTimeout=3000&autoReconnect=true db.user=root db.password=root
- 初始化数据库 创建一个名为
nacos_config的数据库,并将NACOS_PATH/conf/nacos-mysql.sql中的表结构导入该库中。
3.3. Nacos 数据存储
Nacos Server 的配置数据是存在哪里呢?
- Standalone 模式:默认使用内嵌的 Derby 数据库。数据存储在
NACOS_PATH/data/derby-data目录。在此模式下,即使在application.properties中配置了 MySQL,也会被忽略。 - Cluster 模式:自动使用 MySQL。如果没有配置 MySQL 数据源,启动会报错。
注意:Nacos 早期版本可能不支持 MySQL 8.0,请根据您使用的 Nacos 版本选择合适的 MySQL 版本。
4. 实战:使用 Nacos 作为注册中心
下面将演示如何将微服务注册到 Nacos。
项目结构: 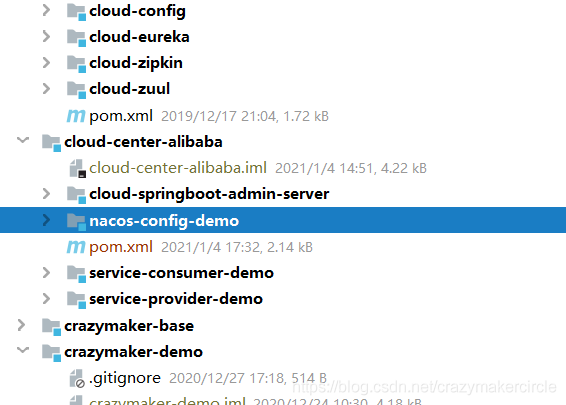
4.1. 引入 Nacos Client 依赖
首先,在父 pom.xml 中引入 Spring Cloud Alibaba 的 BOM。
1
2
3
4
5
6
7
8
9
10
11
12
13
14
15
16
17
18
19
20
21
22
23
24
25
26
27
28
29
30
<parent>
    <groupId>org.springframework.boot</groupId>
    <artifactId>spring-boot-starter-parent</artifactId>
    <version>2.0.4.RELEASE</version>
    <relativePath/>
</parent>

<properties>
    <spring-cloud.version>Finchley.SR2</spring-cloud.version>
    <spring-cloud-alibaba.version>0.2.0.RELEASE</spring-cloud-alibaba.version>
</properties>

<dependencyManagement>
    <dependencies>
        <dependency>
            <groupId>org.springframework.cloud</groupId>
            <artifactId>spring-cloud-alibaba-dependencies</artifactId>
            <version>${spring-cloud-alibaba.version}</version>
            <type>pom</type>
            <scope>import</scope>
        </dependency>
        <dependency>
            <groupId>org.springframework.cloud</groupId>
            <artifactId>spring-cloud-dependencies</artifactId>
            <version>${spring-cloud.version}</version>
            <type>pom</type>
            <scope>import</scope>
        </dependency>
    </dependencies>
</dependencyManagement>
版本兼容性注意:
Spring Cloud Alibaba 版本需要与 Spring Boot 和 Spring Cloud 版本兼容。例如,文档中说与 Spring Boot 2.0.x 兼容,但实测
2.0.6.RELEASE可能会报错java.lang.NoClassDefFoundError: org/springframework/core/env/EnvironmentCapable。请务必参考官方版本对应关系。
4.2. Provider 微服务
Step 1: 添加依赖
在 service-provider-demo 的 pom.xml 中添加以下依赖:
1
2
3
4
5
6
7
8
<dependency>
    <groupId>org.springframework.boot</groupId>
    <artifactId>spring-boot-starter-web</artifactId>
</dependency>
<dependency>
    <groupId>org.springframework.cloud</groupId>
    <artifactId>spring-cloud-starter-alibaba-nacos-discovery</artifactId>
</dependency>
Step 2: 启动类
使用 Spring Cloud 原生注解 @EnableDiscoveryClient 开启服务注册与发现。
1
2
3
4
5
6
7
8
9
10
11
12
13
14
15
16
17
18
19
20
21
22
23
package com.crazymaker.cloud.nacos.demo.starter;

import org.springframework.boot.SpringApplication;
import org.springframework.boot.autoconfigure.SpringBootApplication;
import org.springframework.cloud.client.discovery.EnableDiscoveryClient;
import org.springframework.context.ConfigurableApplicationContext;
import org.springframework.core.env.Environment;

@SpringBootApplication
@EnableDiscoveryClient
public class ServiceProviderApplication {
    public static void main(String[] args) {
        ConfigurableApplicationContext applicationContext = SpringApplication.run(ServiceProviderApplication.class, args);
        Environment env = applicationContext.getEnvironment();
        String port = env.getProperty("server.port");
        String path = env.getProperty("server.servlet.context-path");
        System.out.println("\n--------------------------------------\n\t" +
                "Application is running! Access URLs:\n\t" +
                "Local: \t\thttp://localhost:" + port + path + "/index.html\n\t" +
                "swagger-ui: \thttp://localhost:" + port + path + "/swagger-ui.html\n\t" +
                "----------------------------------------------------------");
    }
}
Step 3: 提供 REST 接口
提供一个简单的 REST 接口用于测试。
1
2
3
4
5
6
7
8
9
10
11
12
13
14
15
package com.crazymaker.cloud.nacos.demo.controller;

import org.springframework.web.bind.annotation.PathVariable;
import org.springframework.web.bind.annotation.RequestMapping;
import org.springframework.web.bind.annotation.RequestMethod;
import org.springframework.web.bind.annotation.RestController;

@RestController
@RequestMapping("/echo")
public class EchoController {
    @RequestMapping(value = "/{string}", method = RequestMethod.GET)
    public String echo(@PathVariable String string) {
        return "echo: " + string;
    }
}
Step 4: 配置文件
在 application.yml 中配置服务名和 Nacos Server 地址。
1
2
3
4
5
6
7
8
9
spring:
  application:
    name: service-provider-demo
  cloud:
    nacos:
      discovery:
        server-addr: ${NACOS_SERVER:localhost:8848}
server:
  port: 18080
启动服务后,可以在 Nacos 控制台看到 service-provider-demo 已经注册。
4.3. Consumer 微服务
Consumer 服务将通过 Nacos 发现 Provider 服务并进行远程调用。
Step 1: 添加依赖并配置 RestTemplate
除了和 Provider 相同的依赖外,还需要配置 RestTemplate 并添加 @LoadBalanced 注解以开启客户端负载均衡。
1
2
3
4
5
@LoadBalanced
@Bean
public RestTemplate restTemplate() {
  return new RestTemplate();
}
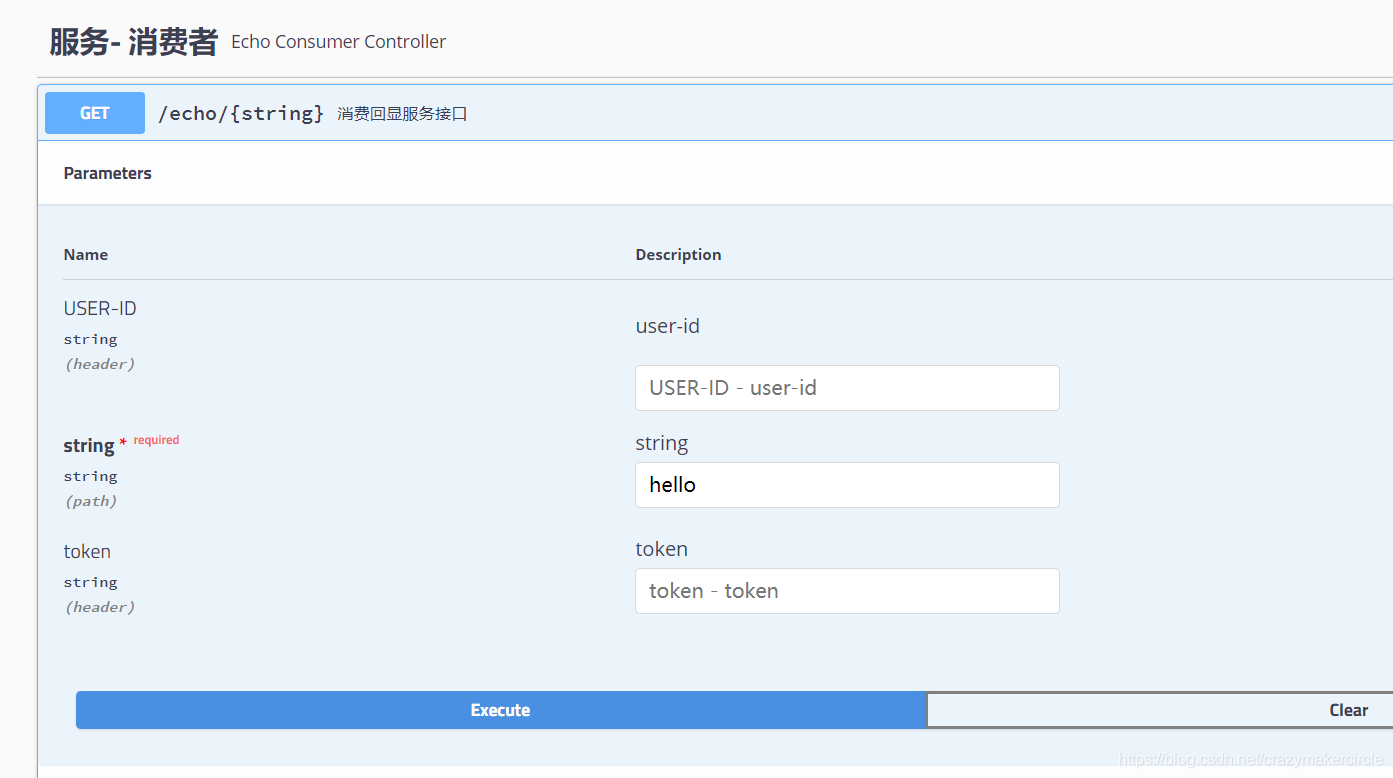
Step 2: Controller 调用远程服务
这里使用 FeignClient 进行演示。
1
2
3
4
5
6
7
8
9
10
11
12
13
14
15
16
17
18
19
20
21
package com.crazymaker.cloud.nacos.demo.consumer.controller;
import com.crazymaker.cloud.nacos.demo.consumer.client.EchoClient;
import org.springframework.web.bind.annotation.PathVariable;
import org.springframework.web.bind.annotation.RequestMapping;
import org.springframework.web.bind.annotation.RequestMethod;
import org.springframework.web.bind.annotation.RestController;
import javax.annotation.Resource;
@RestController
@RequestMapping("/echo")
public class EchoConsumerController {
@Resource
private EchoClient echoClient;
@RequestMapping(value = "/{string}", method = RequestMethod.GET)
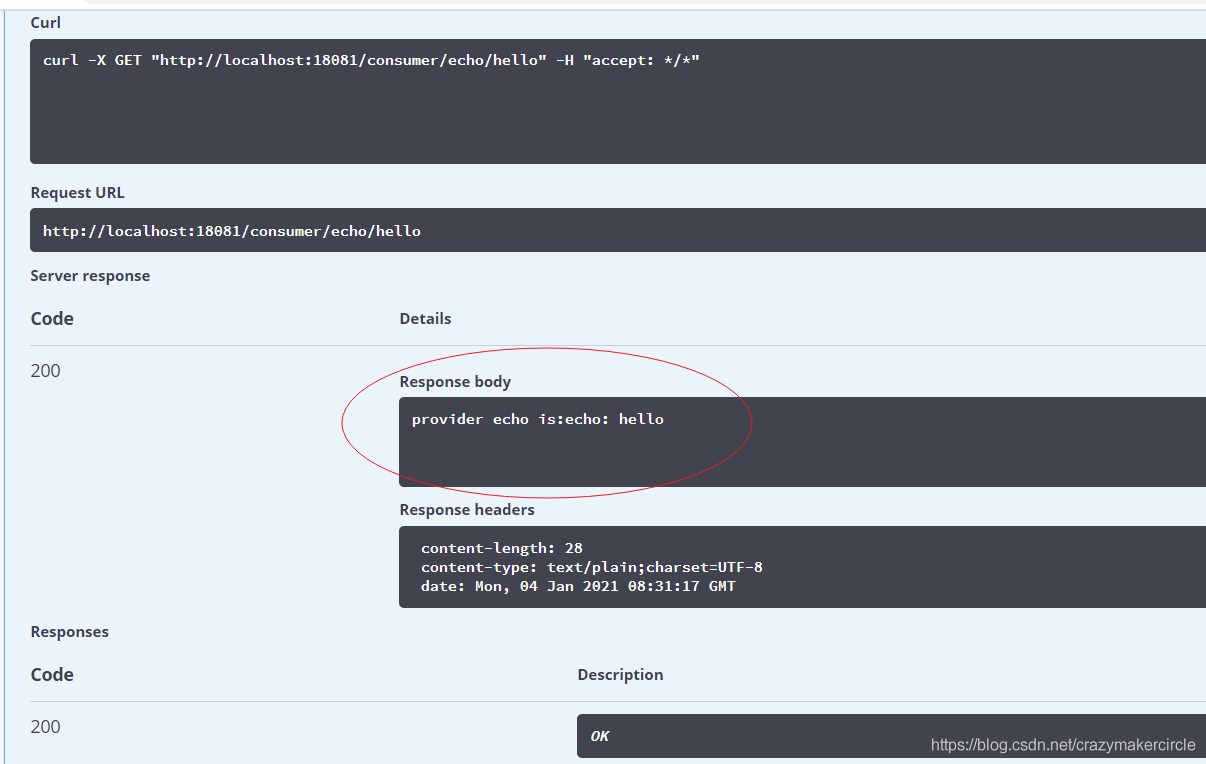
public String echoRemoteEcho(@PathVariable String string) {
return "provider echo is: " + echoClient.echo(string);
}
}
Step 3: 配置文件
1
2
3
4
5
6
7
8
9
spring:
  application:
    name: service-consumer-demo
  cloud:
    nacos:
      discovery:
        server-addr: 127.0.0.1:8848
server:
  port: 18081
启动服务后,访问 Consumer 的接口,它会调用 Provider 的 echo 接口并返回结果。
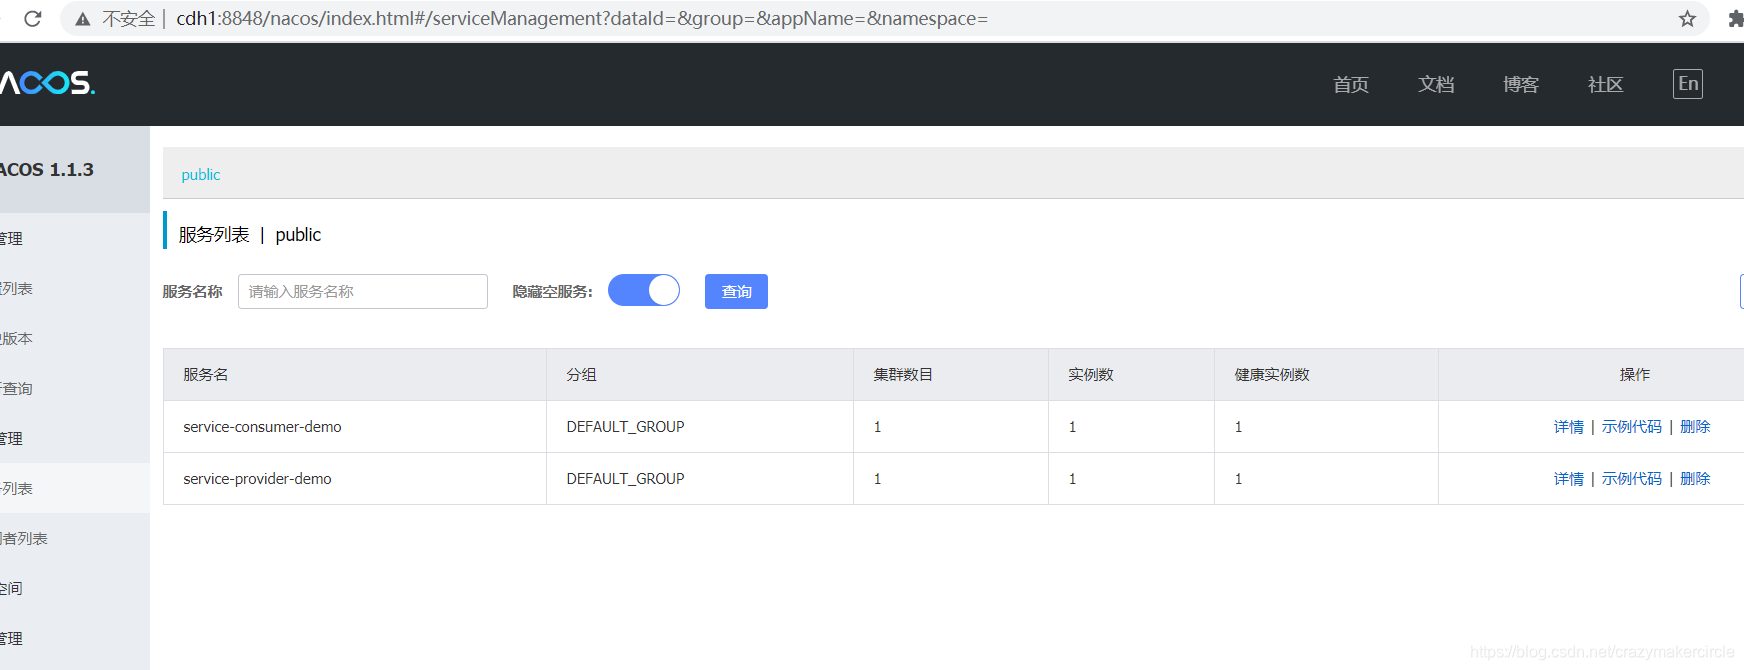
4.4. Nacos 控制台
此时查看 Nacos 控制台,可以看到两个服务都已成功注册,并能查看其详情。
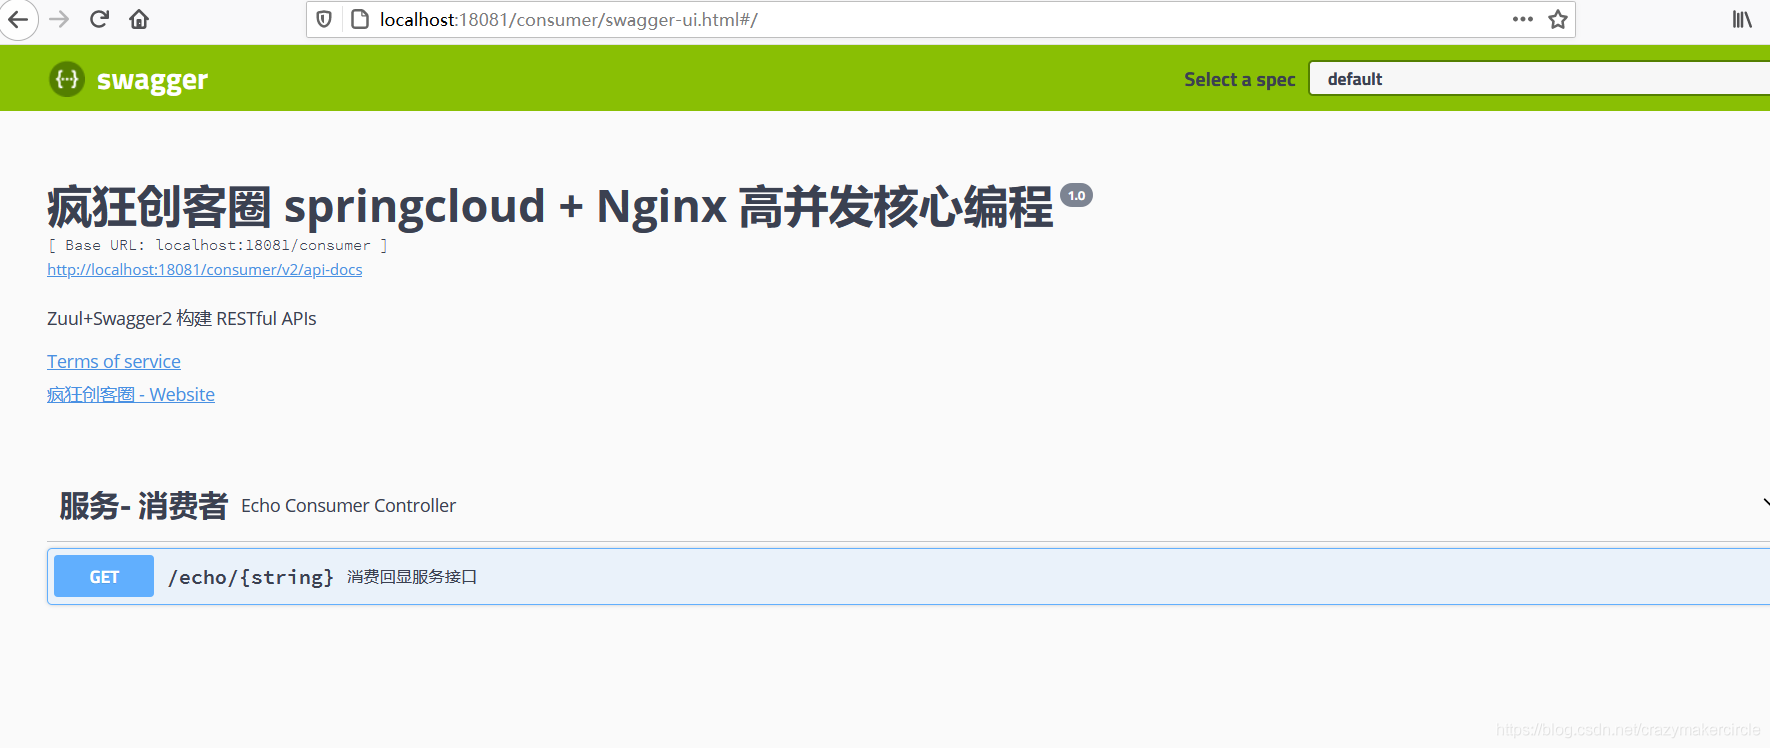
4.5. 演示地址
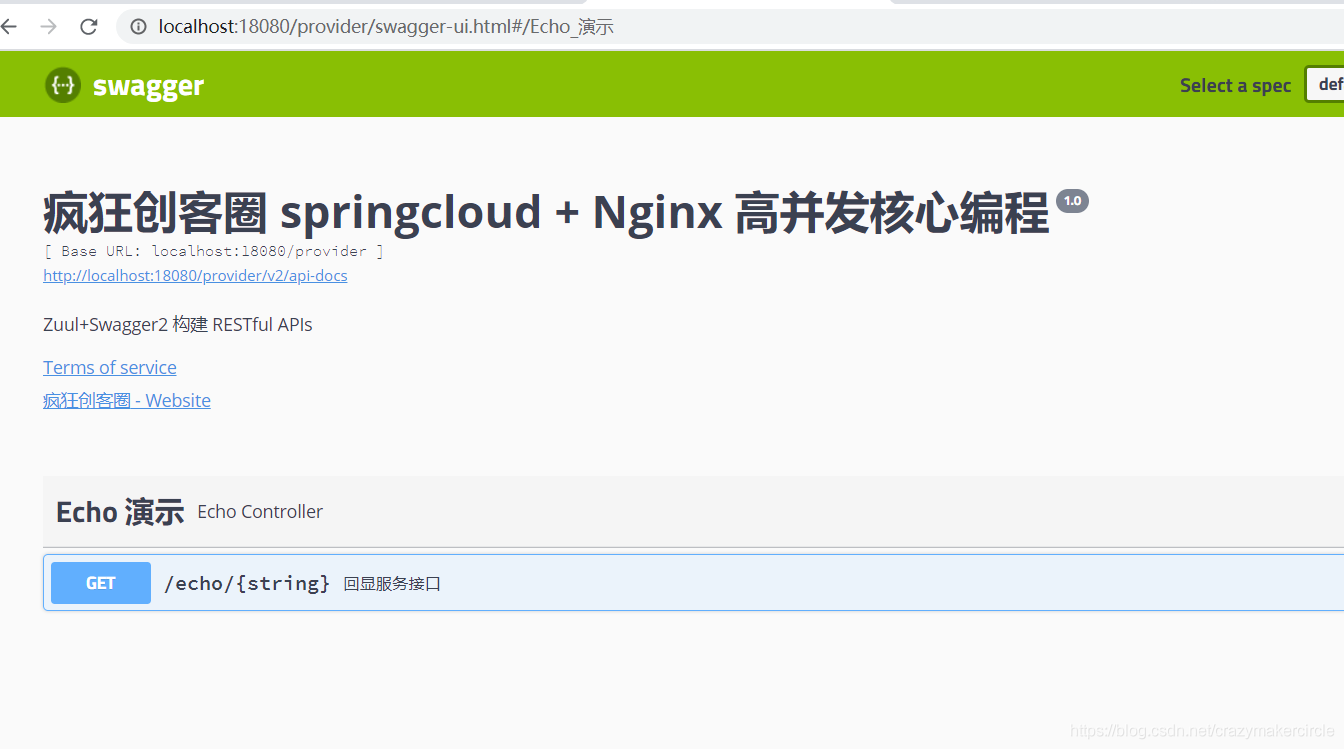
- 服务提供者 (Provider):
http://localhost:18080/swagger-ui.html - 服务消费者 (Consumer):
http://localhost:18081/swagger-ui.html - Nacos 注册中心:
http://<nacos-ip>:8848/nacos/